Have you ever looked at a reflection photograph and thought to yourself that it must be really hard to achieve? Well, we’re here to tell you that it’s not hard at all! Today, we’ve got a very easy Photoshop reflection photography tutorial that will teach you how to add a reflection to your photograph and make it look realistic and smooth.
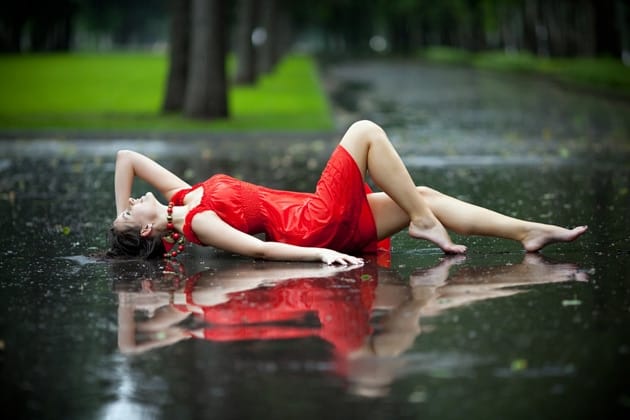
Before we start, you must know that reflections work really well on images with open pavement and also HDR processed images that give the pavement a wet look. Once you’ve got your image ready, it’s time to get cracking! In less than 10 minutes, we assure you are going to get a perfect result!
First Step – Copy a Part of the Image
Select the marque tool and draw around the area of your picture that you want to turn into a reflection. Make sure you get enough of the image vertically. Copy the selection you’ve made by right clicking on the image and choose layer via copy from the menu that pops up. You can also copy the selection using copy from the edit menu or using the command/control+c keyboard shortcut.
Second Step – Paste it as a New Layer
If you chose layer via copy, then it automatically pastes as a new layer. If not, then you need to paste it yourself as command/control+v or edit and then paste.
Third Step – Flip the Layer
Once the selected layer is pasted, you need to choose from the edit menu the following selections: transform followed by flip vertical, so that the new layer gets flipped upside down. You want a reflection, right? Well, a reflection is always flipped!
Fourth Step – Position the Layer

The fourth step is to select the move tool from the tool palette and take the flipped layer and drag it down until the both images begin to line up where the reflection begins. Don’t worry if the two images don’t line up perfectly at first, the image can always be touched up during our seventh step, when you’re making all the finishing touches.
Just make sure you just move the layer up and down, and not side to side, because otherwise you’ll just have gaps on the edges of your reflection, and you wouldn’t want that.
Fifth Step – Change the Layer Blend Mode
Now you must change from your layer panel, the layer blend mode (near the top of the layers panel, right next to opacity). The default blend mode is normal and you must change it to lighten mode.
Lighten modes include: lighten, screen, linear dodge, lighter color and screen. These layer blend modes modify how the selected layer interacts with the one beneath it, also known as the original image. For reflections, lighten or screen are recommended, depending on the image. Try both and see which one works better for you. You’re going to notice that the layer starts to look like a real reflection!
Sixth Step – Mask the Layer
Even though the reflection looks pretty good, in most cases, you will need to mask the later to adjust light and various other features of the image. You can do this by clicking on icon add layer mask at the bottom of your Layers Panel. You can also add a layer mask by going to Layers Menu, then Layer mask, then choosing Reveal All.
After you’ve done this, you need to select the Gradient tool from your tools panel. Use the d shortcut on your keyboard to set the background and foreground colors to default and then hit x to switch the colors. When they are set to black and white and your gradient tool is selected and ready to use, check again that you are not on the layer, but on the layer mask.
When we’re masking the layer, we want to hide the outer edges, so that it fades out towards the bottom of the image and looks as natural as possible. Play around with the gradient tool, until you get it right. You will use the undo shortcut pretty often at this stage. Trust your senses, though!
Seventh Step – Finishing Touches (Optional)
There are times when you will need to do some finishing touches to your reflection layer so that it looks as real as possible. You can choose to show or hide certain areas of the reflection and you can do that with the help of your brush tool at a very lowered opacity, around 10%-20%. Then, you will want to paint with black on the mask over the places you want to hide and with white over the areas you want to show and highlight.
We hope this short Photoshop reflection photography tutorial was useful and you are able to create wonderful reflections on your photos. Our advice is to continue playing with this tutorial, to try out new things, to experiment, because that’s the best way to learn! Just have fun with Photoshop and it will give you some great results!


