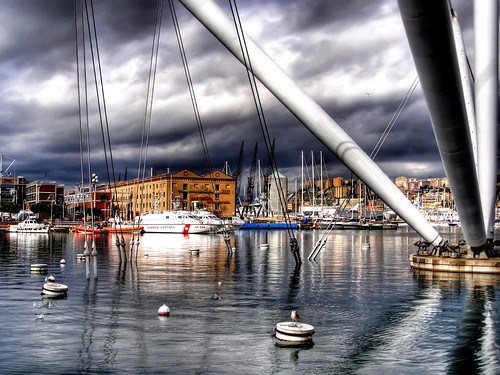
HDR photography was made to address the restrictions of photography equipment, mainly in the sensors of digital cameras. This technology was intended to recreate in photos, as accurately as possible, a human experience by connecting what the human eye actually sees and what a digital camera can shoot.
You can think of HDR as being a complex, ND filter based on software. Instead of applying a filter on your lens when you shoot images, you can accomplish a natural HDR in Photoshop and Lightroom. You won’t have to carry massive equipment with you when taking shots and you can work on your image from the comfort of your own home.
The reason HDR received such bad press recently is that there is a misconception regarding what it actually stands for. The concept that HDR is a new type of photography is entirely incorrect. HDR isn’t a genre or style it’s simply a post-processing technique. It’s just a tool and you will have control over the process.
1. Bracketing images
Before you can get started on processing images for HDR you will have to take some bracketed photos with different levels of exposure. Typically you can take three to five shots for each series. However, if you plan on shooting in extreme conditions of light, such as with the sun right in front of you, it’s possible that you will have to shoot up to nine images.
It’s ideal to shoot multiple images with the help of a tripod, but it’s not completely necessary because Photoshop has a very good alignment function built in. It’s possible to take shots with the camera in your hands and align them in Photoshop.
2. Lightroom Preprocessing
The preprocessing step is a very easy one and shouldn’t take that long. You will have to import your images in Lightroom and apply these adjustments that can be found inside the Lens Correction section.
Turn on Profile Corrections. Adobe Lightroom will automatically detect which type of lens you used and will apply corrections in order to fix any distortion on your images.
Remove the Chromatic Aberration. Adobe Lightroom will automatically clean the edges of your images.
3. Photoshop Tone Mapping
This is mostly an automated process and shouldn’t take more than a couple of minutes to achieve.
In Adobe Lightroom select the photos you want to merge. Right click on the selection and enter Edit In -> Merge to HDR Pro in Photoshop.

The photos you chose will appear in Photoshop and will be put in individual layers. Instantly, an algorithm will be used to align all your image layers. This is very useful if you shot your photos without a tripod.
After this, the HDR Pro platform will be brought on. The only thing that you will have to do inside the interface is to pick the tone mapping setting. We recommend that you choose the 32 bit feature in order to keep as much data as possible from the original photos. Select OK.
The HDR Pro will merge the images together and will open the 32 bit image in the main interface in Photoshop. The process is now complete. All that remains is for you to save your image. The HDR image is automatically imported in Lightroom after you save it. The processed image will be right next to your original images.
4. Lightroom Processing
This is the best step. You will edit your HDR image with its huge bit depth to make it look the way you want it to. Make use of the standard workflow in Lightroom to satisfy your creative view.

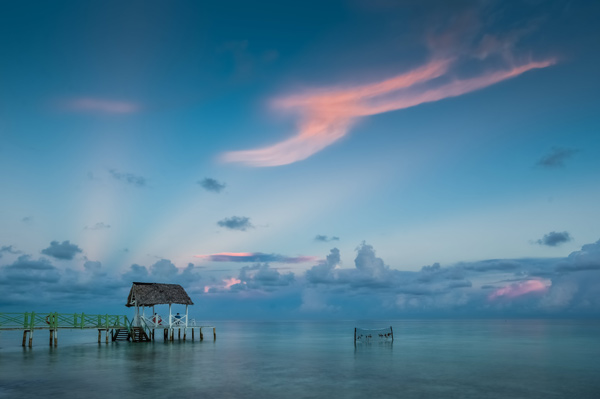
This is a photograph taken in Cuba that has been achieved by following these steps. Below it you will see another image with the settings used to achieve it.

You’re all done now. If you are pleased with how your image turned out you can export it from Lightroom as a JPEG.
5. Photoshop final touch
This is an optional step but during certain circumstances these kinds of images will require extra work, like a bit of noise reduction, cleaning of HDR artifacts and sharpening. Photoshop is the go to program when it comes to these edits.
Select your finished image in Lightroom and right click on it. From there you will have to choose Edit -> Edit in Adobe Photoshop. Once it’s opened in Photoshop, make all the necessary adjustments in order to improve it. Most of the times, all you will have to do is apply a little noise reduction.
That’s about it. Use these simple steps in order to achieve natural HDR in Photoshop and Lightroom.


