Visual Storytelling Tips & Tools for Creative Photographers

Visual storytelling is, as the name suggests, a narration done through visual means. It is one of the most powerful communication methods available in the world today. Today, we’re going to discover the sheer force of visual storytelling, how photographers can use it and we’re also going to share a few tips and tricks with you on how to create a great visual story through your photographs.

Visual Storytelling and Its Power

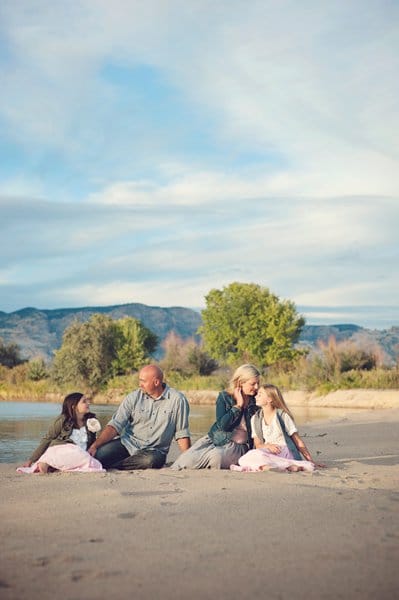
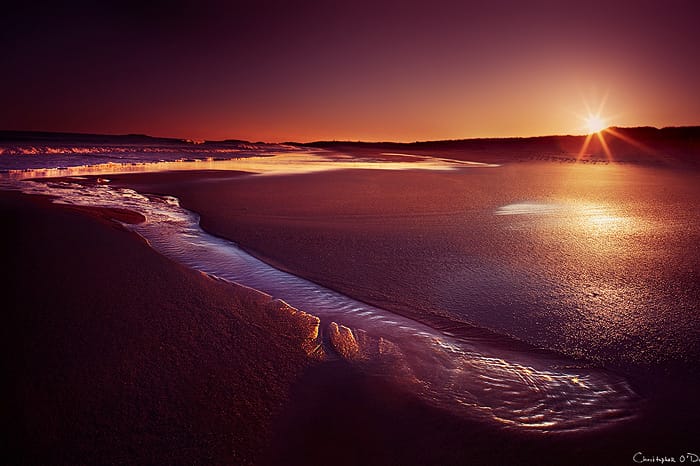
We’ve all heard the saying a picture is worth a thousand words, right? Well, it’s true! Content might be the king, but a powerful photo will override a thousand words in a matter of seconds. In today’s society, people are always looking for access to quick information and we’re all very blessed that we can have access to it. If you want to create a visual story, then showing, instead of telling will help your story.

Child with toy bear cub

Promotion is the Key

Creating a good, even great visual story doesn’t guarantee its success. The thing that does guarantee success is promotion. Your online presence, as a visual storyteller and a photograph, needs to be strong. You need to promote your story or stories and ever social media website known to man. This means quite a lot of work and time, but without this promotion, your work will remain unknown to the masses.

Use Facebook, Twitter and Pinterest first and foremost. These three are the backbone of social media. Be active, be social and be present.

Caption Your Images

Even though an image is worth a thousand words, adding a caption to your images will help people put a name and story to your visual story. Try to keep it as brief as possible, you don’t want to bore people or to take attention away from the photograph. You should know that captions are easy to read and remember and should really capture the gist of what your photograph is saying.

3 Tools for Visual Storytelling

  1. Defrozo – when it comes to creating visual stories, Defrozo is THE tool to use. It is an awesome online workspace that enables photographers to manage their business and workflow online. Log in and you’re ready to create a free photography website to tell your visual stories.
  2. Storify – is a free tool to help photographers create their visual story and share it with the world. As Storify says on their home page, today, everyone’s a reporter and social media can make anyone source as events unfold.
  3. Magistro – is another free tool for creating video stories. Using snapshots, music and videos, you can make your visual story in a matter of minutes and promote it however you please.

5 Rules for Visual Storytelling

1. Know the Story You Want to Tell Before Taking the Photographs for It

If you have something in mind that you want to put into photographs, then it better be clear. Before you start creating the story with your photographs, you should know exactly what it is that you want to evoke. Having a clear picture of what you want to share with the world will make sharing and creating the story much easier.

2. Fact or Fiction?

Visual stories are usually facts, not fiction. As soon as you, the photographer, starts directing people on how to act in front of a camera, your visual story has become fiction. Try to be much a journalist as you can, try to present facts, which is why you need to include some factual details in your visual story for credibility.

3. Assumptions the Viewers Male Have to Be True

Because you’re presenting something that is fact, not fiction, all reasonable assumptions that your viewers are making have to be true. For example, we see a picture of a person crying, and we assume that the person was sad, not that they were acting and the crying fake.

4. Visual Storytelling Means Images, not one Image

Try to capture as many images as you can about the subject you’re trying to make a visual story about. You’ll have a much easier time to select the good ones!

5. Edit Like There’s No Tomorrow

Editing and sifting through your photos is hard. All the photos are your babies, but you need to pare away everything that’s not vital to telling your visual story. Be brave!

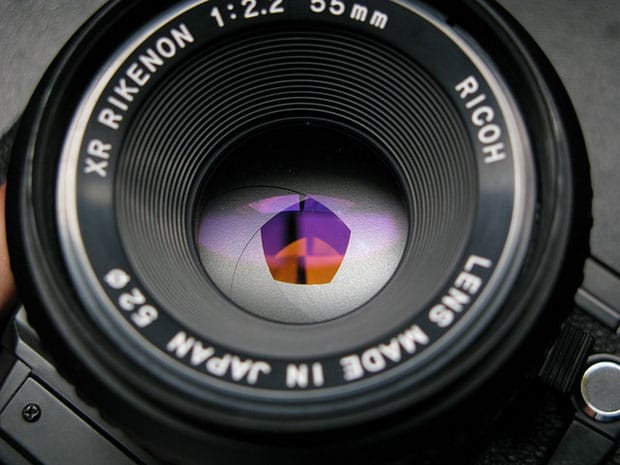
Image Source: depositphotos.com

DSLR Guide for Beginners: The Best Entry Level DSLR Tips

So, you’ve purchased your first DSLR camera, have you? You most likely read the manual, watched tutorials, asked your fellow photographer friends for tips. And still, you are reluctant to experiment with your new purchase. Do you find it easier to just use the Auto function? You don’t even take the camera out with you because you find it too difficult and somewhat embarrassing to fiddle around with various settings? This guide on the best entry level DSLR tips for photographers just starting out. [Read more…]

Natural HDR in Photoshop and Lightroom

HDR photography was made to address the restrictions of photography equipment, mainly in the sensors of digital cameras. This technology was intended to recreate in photos, as accurately as possible, a human experience by connecting what the human eye actually sees and what a digital camera can shoot.

You can think of HDR as being a complex, ND filter based on software. Instead of applying a filter on your lens when you shoot images, you can accomplish a natural HDR in Photoshop and Lightroom. You won’t have to carry massive equipment with you when taking shots and you can work on your image from the comfort of your own home.

The reason HDR received such bad press recently is that there is a misconception regarding what it actually stands for. The concept that HDR is a new type of photography is entirely incorrect. HDR isn’t a genre or style it’s simply a post-processing technique. It’s just a tool and you will have control over the process.

1. Bracketing images

Before you can get started on processing images for HDR you will have to take some bracketed photos with different levels of exposure. Typically you can take three to five shots for each series. However, if you plan on shooting in extreme conditions of light, such as with the sun right in front of you, it’s possible that you will have to shoot up to nine images.

It’s ideal to shoot multiple images with the help of a tripod, but it’s not completely necessary because Photoshop has a very good alignment function built in. It’s possible to take shots with the camera in your hands and align them in Photoshop.

2. Lightroom Preprocessing

The preprocessing step is a very easy one and shouldn’t take that long. You will have to import your images in Lightroom and apply these adjustments that can be found inside the Lens Correction section.

Turn on Profile Corrections. Adobe Lightroom will automatically detect which type of lens you used and will apply corrections in order to fix any distortion on your images.

Remove the Chromatic Aberration. Adobe Lightroom will automatically clean the edges of your images.

3. Photoshop Tone Mapping

This is mostly an automated process and shouldn’t take more than a couple of minutes to achieve.

In Adobe Lightroom select the photos you want to merge. Right click on the selection and enter Edit In -> Merge to HDR Pro in Photoshop.

Natural HDR in Photoshop

The photos you chose will appear in Photoshop and will be put in individual layers. Instantly, an algorithm will be used to align all your image layers. This is very useful if you shot your photos without a tripod.

After this, the HDR Pro platform will be brought on. The only thing that you will have to do inside the interface is to pick the tone mapping setting. We recommend that you choose the 32 bit feature in order to keep as much data as possible from the original photos. Select OK.

The HDR Pro will merge the images together and will open the 32 bit image in the main interface in Photoshop. The process is now complete. All that remains is for you to save your image. The HDR image is automatically imported in Lightroom after you save it. The processed image will be right next to your original images.

4. Lightroom Processing

This is the best step. You will edit your HDR image with its huge bit depth to make it look the way you want it to. Make use of the standard workflow in Lightroom to satisfy your creative view.

Natural HDR in Photoshop

This is a photograph taken in Cuba that has been achieved by following these steps. Below it you will see another image with the settings used to achieve it.

Natural HDR in Photoshop

You’re all done now. If you are pleased with how your image turned out you can export it from Lightroom as a JPEG.

5. Photoshop final touch

This is an optional step but during certain circumstances these kinds of images will require extra work, like a bit of noise reduction, cleaning of HDR artifacts and sharpening. Photoshop is the go to program when it comes to these edits.

Select your finished image in Lightroom and right click on it. From there you will have to choose Edit -> Edit in Adobe Photoshop. Once it’s opened in Photoshop, make all the necessary adjustments in order to improve it. Most of the times, all you will have to do is apply a little noise reduction.

That’s about it. Use these simple steps in order to achieve natural HDR in Photoshop and Lightroom.

Images source: 1, 2, 3

The Best Light Source is Sunshine

Most people think that the more equipment they have, the better. However, I’m quite the opposite. I find that carrying around heavy lights, flashes and reflectors is a pain. The best light source is sunshine, in my opinion.

I would like to share with you some words of advice that will help you take advantage of that big giant reflector up there. With a little luck, you will begin to appreciate the natural light much more whether you hate carrying around big equipment or not.

The sun is distinct

One of the things I appreciate about the sun is that it’s always different. While it may seem like quite the challenge to have a very unpredictable source of light, I really like that every shoot, every photo, every day is special and one of a kind. It would be impossible to recreate the exact lighting I had one day. There are some days when everything works absolutely perfect and I appreciate them completely.

Take notice on how the light looks on the face of your subject

The Best Light Source is Sunshine

Many beginner photographers take photos with very harsh shadows and lights on the faces. This is because in most cases they don’t really pay attention to the subject but on the background. This can be a huge issue if you try to take photos in very bright sunlight, such as early afternoon or midday.

Sunlight is a great source of light but you do have to put a little effort into it and position what you’re trying to take a picture of just right.

Try backlighting

Take a shot with the sun behind your subject. This is my favorite technique because if the sun is behind the subject and facing you it will make it glow. However, there are some things you need to be aware of when attempting to shoot this way.

Use the backlight at any time of the day

You will get different results when shooting when the sun is in various positions. It’s a great way to shoot when the light is very powerful as it will soften the shadows and light on the face of your subject.

Move around when shooting

The Best Light Source is Sunshine

The differences in the angles can have a great impact on the image. I personally enjoy having the sun behind the subject but relatively to the side. If you shoot when the sun is directly in front of you, it’s possible to get flares inside the lens and this will ruin the subject. Make sure you experiment to see what actually works for you.

Manipulate the light by using bushes, trunks, poles etc.

You can get amazing soft bokeh when the sun is right behind bushes or trees. This will filter the light so it won’t be as harsh and you’ll get soft, warm lighting. Positioning yourself behind a pole or a tree will remove some glare and harshness from your lens. You don’t have to take a shot of the pole or tree, you just have to use it with your lighting.

Be careful what you’re wearing

As a photographer, it’s better to use white or light tops and to avoid wearing very bright colors. While you may think it doesn’t matter what the photographer is wearing, the fact is that the sun can reflect from your clothes, casting colors on the subject that you don’t want.

Use your body and the subject’s body to work with sunlight

You could position yourself in such a way that the sun is behind your subject, so the subject can filter the sunlight and also reduce the glare inside the lens. This technique can also produce a starburst effect or a glow. If you feel that you’re getting way too much glare inside the lens, hold your hand to the side of the lens to cut down the amount of sunlight going into your camera.

Experiment with sunlight directly on the subject

The Best Light Source is Sunshine

There are advantages to this technique, such as being able to include the sky in your image. When you use backlight, the sky will most likely be blurry because you will need to focus on the exposure of your subject. It’s true that adding sky in post-processing is pretty easy, but when you take a shot with the sunlight right behind you, facing the subject, you can capture both.

Be aware that it’s pretty difficult for the subject not to squint in direct sunlight

If you shoot on a very bright day, you may be forced to position your subjects in such a way so that they look away from the sunlight. Many are sensitive to bright lights, which means that you probably won’t be able to shoot with front lighting except if the sun is almost set.

Use sunlight when shooting portraits

The Best Light Source is Sunshine

When the sun is almost set or the sunlight is soft you can position your subject so that the light is falling from the side. This will allow you to capture great portraits.

Watch how the light falls

I constantly find myself analyzing how the light falls on the faces of people I talk with. I analyze how the shadows fall during different hours of the day. I constantly study the light and always take shots in my head.

Images source: 1, 2, 3, 4

Camera Exposure Guide: Everything you Need to Know

There is something called “the exposure triangle” that you must be aware of in order to completely have control over your digital camera exposure.

These three elements are ISO, Aperture and Shutter Speed. These three elements are responsible for the exposure of an image. If you change one of these elements, you will affect the others. This basically means that you won’t be able to fixate on just one of these settings and completely ignore the other ones.

Camera Exposure Guide

Here are some metaphors that will help you better understand the exposure triangle:

A lot of people illustrate the connection between the Shutter Speed, Aperture and ISO using numerous metaphors to help us better understand how to get great exposure. However, like many metaphors, these aren’t perfect and are mainly for demonstrative purposes.

Sunbaking

One metaphor a friend shared with me is to look at the exposure on your digital camera like getting your skin tanned.

A suntan is something I always wanted when I was a kid, however I have very sensitive skin and this wasn’t something I could achieve. When I went into the sun all I did was get very burnt.

The ISO rating can be compared to your skin. Some individuals may be more sensitive than others.

The shutter speed is compared to the time you spend in the sun. If you spend a lot of time out in the sun, you will increase your chances of getting tanned. On the other hand, if you spend way too much time in the sun you end up being overexposed.

The aperture is the sunscreen you apply on your skin in this metaphor. Depending on the strength of the sunscreen, it blocks the sun at various levels. If you put on a very strong sunscreen you will reduce the amount of light coming through. This will help even the most sensitive person stay a lot longer out in the sun. If you decrease your aperture you can decrease the ISO and slow the shutter speed down.

The Window

Look at your camera as if it were a window with shutters that close and open.

The size of the window is represented by the aperture. If the window is bigger, the more light it will let in and the room will be brighter.

The amount of time the shutters are open is the shutter speed. If you live them open for a long time, a lot of light will get through.

Put yourself in a room and imagine you’re wearing sunglasses. You are desensitized to the light coming in because of the sunglasses. This is how a low ISO setting works.

You can increase the light in a room in numerous ways. You can let the shutters open for a longer period of time by decreasing the shutter speed, you could take off the sunglasses you’re wearing by making the ISO larger and you can make the window bigger by increasing the aperture.

While this isn’t the perfect metaphor to explain things, it does get the job done.

The Garden Hose

If you’re confused about aperture, ISO, shutter speed and whatnot than you can use this analogy that will help you better understand all those confusing notions.

Just think about the garden hose you use to put water in a bucket.

The aperture is the diameter of your garden hose. If you have a garden hose with a large diameter, more water will go through it.

The shutter speed is the amount you let the tap open. The more you leave the tap running, the more water will go through the garden hose.

ISO is the speed of the water flow. More water goes through the hose if the speed of the water is faster.

Exposure is the amount of water you have collected into your bucket.

Bring the settings together

It takes serious practice to master digital camera exposure. It’s a very fine art that makes even the most advanced photographers experiment with their settings on the go. You should always be aware of the fact that if you change one of these settings you will have an impact on other aspects of your image, not only the exposure.

For example: if you change the aperture you will change the depth of field, if you change the shutter speed you will affect the way motion is shot and if you change the ISO you will change the amount of grain on your image.

One of the good things about digital cameras is that you can experiment a lot until you learn how exposure actually works. You can shoot as many images as you want for free and digital cameras have settings not only for Manual mode and Auto mode but for semi-auto modes such as shutter priority and aperture priority that will let you change one or two of the elements found in the exposure triangle and the camera will do the rest for you.

Here is a very brief explanation of what these three separate things actually mean:

What is ISO?

ISO, in digital photography, measures the image sensor’s sensitivity to light. The principles are the same as in traditional photography. To make your camera less sensitive to light and to have finer grain on your photos you will have to lower the ISO number.

What is aperture?

To put it in very simple terms: The opening in your lens is called aperture.

A hole inside your camera opens up when you press the shutter button so that the image sensor can see what you’re trying to get a shot of. The size of the hole opening inside depends on how you set the aperture. If the hole is smaller, the less light gets in, if it’s bigger, more light will reach the image sensor.

What is shutter speed?

The amount of time the shutter remains open depends on your shutter speed settings. Shutter speed, in digital photography, is the amount of time the image sensor “looks” at what you’re taking a photo of.

So there you have it. This was our camera exposure guide. We really hope it was helpful and wish you the best of luck with your photography.

Image source: 1

How to Make a Starburst Effect for Your Photographs

When taking a photo in light sources such as the sun, you may see that your images have a special quality on the light. This unique quality is called a starburst effect. You can use this effect to create a brilliant focal point on your image.

This kind of effect is not only limited to sunlight. You can create such an effect using a variety of light sources like headlights, reflected lights and street lamps. Additionally, the effect can be added in digital photography using certain effects. This effect works especially well at night because the numerous lights in the urban landscape can be used to create a starburst effect.

What causes a Starburst Effect?

If a light source is brighter than the rest of the environment the effect is much more noticeable. This source of light may be the sun during daytime and pretty much every light during nighttime. However, a starburst entails much more than this.

The short explanation is that an aperture that is smaller will amplify the rays coming from a light a lot more than a wide aperture. The blades will make angles a lot stronger in small apertures which is why the camera’s sensor picks up the effect. The aperture is rounder when you shoot wide open which gives the sensor a softer source of light.

Check out the differences between this starburst photography shot with small aperture and wide aperture:

Starburst Effect

The above image was shot with a small aperture (f/16) and it is a great example of how to make a starburst effect. The rays of light are very pronounced and this creates a more dramatic focal point.

Starburst Effect

In comparison, the above photo was shot with a wide aperture (f/1.8) with the wheat grass in focus. The sun is a lot softer in contrast with the first photo.

Because you use a small aperture to create a starburst effect, your starburst images should be really well focused. To get the sharpest possible photo, lock the focus on the main subject to make your focal point very sharp.

How to Make a Starburst Effect at Nighttime

Starburst Effect

This effect isn’t limited to daytime. You can create the effect using rays of light when you shoot at night also. You can take starburst images that have a lot of small starbursts which will add a lot more interest to a boring photograph, as seen in the photo with the bridge. Make sure to use a longer exposure when you shoot photos at night, because if you don’t you might end up with a photograph that’s blurry or/and underexposed.

Turn off any “vibration reduction” or “image stabilization” features when using a tripod. These functions are practical only when you shoot images with the camera in your hands and these features can actually damage a photo if you use a tripod.

Reflected light

Because any light source can create this effect, this is also the case of reflected light. This is commonly used in macro photography. Small drops on plants can reflect the sunlight which will create a tiny starburst in your image.

Starburst Effect

In the photo above you can notice that the starburst effect is a great focal point and turns an otherwise typical macro image into a beautiful and unique photo.

Carefully Consider Shooting at f/32

You may be persuaded to go below an f/16 aperture when reading all these wonderful things about the effect. However, if you are worried about the resolution, sharpness and the image quality you may want to reconsider.

If you push things too far, shooting with a very small aperture can actually damage your images. Customarily, lenses have a sweet spot at around f/8 to f/11 and this is where they are the sharpest. Adjusting your aperture smaller or wider than this may damage the overall quality of the photo. This is more obvious when you use a smaller aperture (f/16 or more) than when you use a wider aperture.

How you use and how far you go with the aperture is entirely up to you and what you think a good image is. In my personal opinion, I would not go any lower than f/16 unless I absolutely have to. There are a lot of wonderful photographs taken beyond an f/16 aperture, for instance the image with the drop of water was shot at f/20. You can clearly notice that the photo has a somewhat reduced clarity, but the beautiful effect overshadows the minor imperfections. You should experiment on your own with numerous apertures to find out what is acceptable to you.

Images source: flickr.com, lightstalking.com

How To Shoot Digital Infrared Photography

Digital Infrared Photography

Image source: photovideoedu.com

The colors we see are just a little portion of the light spectrum. Starting from deep red to violet, the colors occupy about 380 nanometers to 750 nanometers. Wavelengths shorter in size are called Ultraviolet and wavelengths longer than that are called Infrared. Some cameras can even capture this in the form of digital infrared photography.

Even though we can’t see with the naked eye these extremities, the sensor on a camera is able to pick up on them. But for normal photography, these wavelengths can be harmful so that is why camera manufacturers put IR (infrared) and UV (ultraviolet) filters on the sensors, to cut them out of the image. However, infrared light can really create some hauntingly beautiful photos.

Infrared photos can be recognized by the black skies and white trees in black and white or with strange colors. The strange colors are present because objects respond in a different manner to infrared light. The trees and the plants reflect more light, which makes them seem like they glow, while the sky and water don’t reflect as much. Taking infrared photography in the traditional way was very tricky in the past. The infrared film was very difficult to deal with and was easily fogged in the daylight. The results of traditional photography were always a hit or miss. However, because the modern digital cameras have a preview, now it’s much easier to take an infrared shot.

Even if your camera can see infrared light, without additional planning you won’t get a very impressive photo. The solution that seems to be most common is to use an infrared filter on the lens of the camera. These filters block out all other light other than the infrared wavelengths. However, because these filters are very dark, you won’t be able to see anything through the viewfinder when you have them installed on your lens. A common solution is to prepare the shot first and then add the filter when you’re ready to take it. Some companies will convert your camera to use it to take infrared shots. The sensor is converted for infrared shots so you can have a good view through the viewfinder. However, we don’t recommend this because this process is very hard to reverse.

digital-infrared-photography-2

Image source: hopkinsartscenter.com

Choosing the subject

For the best results you should always try to include some foliage in your shot to get that trademark glow on the image. There is no need for a very bright sunlight for the shot; as a matter of fact a cloudy day will probably get you the best results. Shooting in the summer means that you will have enough of those green plants to include in your photo. For a great shot contrast the foliage with something made by man: stone statues look very good in infrared, or you could try to include some water or a very cloudy sky in the image.

Setting the white balance

Infrared photos are very low in temperatures so they give a warm photo. To counter this you will have to adjust your camera accordingly. With the filter on your lens, hold a sheet of paper and take a reading of the white balance. However, if you wish for more extreme results, take the reading from a blue sky or some green plants.

Set the camera to take Raw shots

By setting your camera to Raw will not only guarantee the best possible image quality but will also give you the choice to adjust the white balance when you process the image and fine-tune it to your liking. If you want a mono infrared image, select the mode Raw+JPEG and make use of your camera’s black and white function. This will let you see what the end result will be while still allowing you to make adjustments to the Raw file.

Use the LCD/LiveView

Placing infrared filters on your lenses causes the viewfinder to be useless. However, you may still be able to see the shot through the LiveView (albeit, very dark) enough to give you an idea of what the image will be.

Focusing

Because of the longer wavelengths, you may need to adjust the focus to get the sharpest results. Professionally converted cameras for infrared use will also have the focusing modified so you can use the autofocus function of the camera as you would on a normal shot.

Shoot in Manual mode

Switch your camera to Manual mode as you will need to adjust the exposure depending on the lighting.

Accessories

When you use an infrared filter on your camera you will need slower exposure. You will probably have shutter speeds of up to, and over eight seconds. This kind of exposure cannot be obtained by holding the camera in your hand. Ensure that you have a very steady tripod and lock the adjustments and legs before taking the shot. Use a remote control to take a picture to even further remove the risk of movement from pressing the shutter button.

We really hope you enjoyed our guide on how to shoot digital infrared photography and wish you the best of luck with your infrared images.

7 Valuable Photography for Beginners Tips

When it comes to photography and beginners, most want-to-be photographers get lost in the sea of new and complicated words like ISO, exposure, aperture and so on, so here is the point in which we come to your aid.

This will be the first guide from a series of articles containing valuable photography tips for beginners and it includes most of the words that are associated with photography and their definition.

1. DSLR, SLR, Point and Shoot cameras

This is probably the main question when it comes to photography cameras for beginners: What kind of camera should I choose?

valuable photography for beginnersWell, a point and shoot camera is a compact camera designed mainly for really simple operations, its features not being complicated or plenty. It is suitable for people who have never used a camera in their lives and want to experience digital photography for beginners.

valuable photography for beginners

A  Single lens reflex camera (SLR) is a camera that has a mirror between the lens and the image sensor or film which helps it provide a focus screen. Having a focus screen lets you see the same image that appears as your digital image or on film in your viewfinder.

valuable photography for beginnersDSLR is a Digital Single lens reflex camera. The difference between a DSLR and a SLR camera is the fact that a DSLR lets you see a live preview of the image you are capturing, on an LCD screen.  In terms of DSLR photography for beginners, you should consider your level of experience, the frequency of use and your budget, before checking out prices for a DSLR camera.

The best camera for photography beginners is probably a point and shoot camera and then decide if photography is actually your passion and if you want to invest more in it.

2. Viewfinder

valuable photography for beginners

A viewfinder is a device used to reveal the field of view through the camera lens and its main purposes involve framing and focusing the picture that you are about to capture.

3. Aperture

valuable photography for beginners

The hole through which the light reaches your film or image sensor is defined as aperture.

4. Shutter Speed

valuable photography for beginners

Shutter speed is the term used to define the amount of time your shutter uses to expose your photographic film. If you want a longer exposure time, you need a slow shutter speed.

5. Exposure

valuable photography for beginnersThe amount of light that goes through the aperture and reaches your image sensor or film is called Exposure, in digital photography. To control your exposure you have to make a good use of your aperture and shutter speed.

6. Macro lens

valuable photography for beginnersTaking a “macro” picture basically means to take a large picture while being really close to the subject. Macro lenses are different from usual lenses through their shape. A macro lens will always be able to focus on a subject from really close without disproportioning the object you want to photograph.

7. ISO

valuable photography for beginnersISO is a term used in digital photography to express the sensitivity of your camera’s image sensor. The light sensitivity of your camera increases with the ISO number, that means that a picture taken at an 100 ISO will be far less grainy than a picture taken at 3200 ISO, for example.

In terms of photography equipment for beginners, you should definitely consider purchasing a tripod, as it will make your pictures less noisy. Some good photography books for beginners can be found either online or in different bookshops.

The best photography books for beginners available online can be found by accessing this link and for some great photography tutorial for beginners, check out this channel.

If you really want to step up your game when it comes to photography skills, tips and tricks, you should also consider investing both time and money into a professional kit, classes or different photography courses or lessons. For a basic user, as long as you know what you want and what you are expecting from a camera and know the concepts of lights, lighting and the definition of the main features, you do not need to spend a lot of money to learn how to use a camera.

The internet is filled with useful information so check out different websites, blogs or forums specialized in photography before purchasing an expensive camera.

You should also keep in mind that you can make a picture look more professional in a photo editing software, so you can still be a good photographer while staying on the cheap side.

More photography tips for beginners will come up in the following days so stay tuned!

4 Best DSLR Camera Choices for Entry-Level Photographers

There is a series of factors that have to be taken into consideration when talking about the best DSLR camera choices for beginners, such as price range, features or frequency of use. What is the best DSLR camera for beginners?

The answer to that question depends pretty much on what you expect from a DSLR camera and how you can make the camera fit your expectations. If you are an entry-level photographer who feels the need to invest more in his passion for photography, after trying the wide range of point-and-shoot cameras out there, then you probably should invest in a DSLR camera.

A DSLR camera can be considered the best DSLR camera for beginners, when it can combine most of the features that point-and-shoot cameras provide with a more professional touch to make it easier for you to improve your photography skills. However, a DSLR camera is a major purchase, so you have to ask yourself what you really want out of it and what are your best choices.

If you are an entry-level photographer, your best choice will be an entry-level DSLR camera, with a user-friendly interface and easy understandable features. Also, if you have a fairly generous budget dedicated to this purchase, choose a camera that is easy to use but that can be also improved with different types of lenses.

Here are four of the best DSLR cameras for beginners that are available for purchase today.

4. Pentax K-50

best dslr camera

We are going to start slow, by presenting the Pentax K-50. Although it has had some mixed reviews, the overall experience that the Pentax provides is really satisfying. If you are planning on going to the next level when it comes to your photography skills and want a budget-friendly DSLR camera, Pentax K-50 is definitely the right camera for you.

It offers a continuous shooting speed of 6 frames per second, a resolution of 16 megapixels, ISO sensitivity that ranges from 100 to 51,200 and video recording in 1080p HD format. Given these facts, Pentax K-50 can be considered one of the best DSLR cameras for video and the most affordable DSLR camera presented in this top.

3. Sony Alpha SLT – A65

best dslr camera

Next one in line is the Sony Alpha SLT – A 65. This entry-level DSLR camera works wonders when it comes to resolution – 24.3 megapixels and it has an impressive continuous shooting speed of 10 frames per second.

As for the features, the camera comes with a dust reduction system, a built in automatic pop-up flash and the ability to record movies in full HD. While this camera offers outstanding image quality at a good speed, it lacks on the design part, being quite heavy at 27.2 ounces.

2. Canon EOS Rebel SL1

best dslr camera
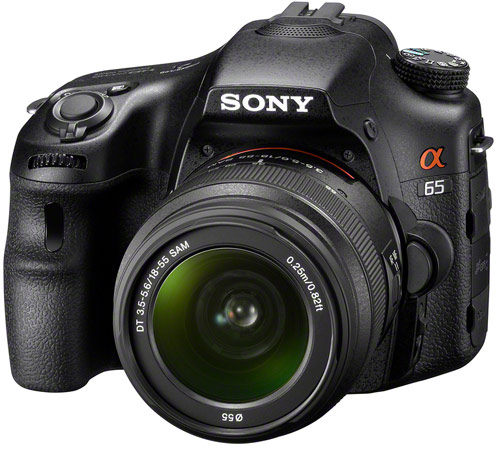
Canon EOS Rebel SL1 is probably the best Canon DSLR camera when it comes to entry-level photographers. The photo and video quality are excellent and the camera itself is considered comfortable, through its ergonomic design. Canon SL1 is currently the world’s smallest and lightest digital SLR camera, but still manages to deliver great performance.

It works great even in low lightning or when capturing fast subjects. Another plus that this camera has is its touchscreen. It is one of the best choices for photographers who want to upgrade from a compact camera and it definitely delivers value for money.

1. Nikon D5200

best dslr cameraNumber one in this top is definitely the Nikon D5200 since it has also been rated as the best DSLR camera 2013, for beginners.  Nikon D5200 first came out on the market in 2012, so it has given us an amazing photography experience for more than 2 years now. Excellent for beginners, excellent as a backup camera if you already have a DLSR worth thousands of dollars, the best buy choice in its price range,

When it comes to DSLR cameras and accessories, the best DSLR camera bag has to be big enough for your camera but it should also have a comfortable design. Use straps with a nice grip, to be sure your camera bag will not slip off your shoulder and also strap around your camera should also be a must-have, to avoid damage caused by accidentally drops.

These were some of the best DSLR cameras 2013 and 2014, suitable for a wide range of entry or mid-level photographers.

8 of the Best Point and Shoot Cameras on the Market

As the quality of smartphone cameras is steadily increasing, point and short cameras have to constantly bring out new, innovative features to be able to cope with competition. A point and shot camera is a camera that lacks the weight and bulky design of a DSLR but it is still able to take high quality photographs very quickly. The main focus behind the best point and shoot cameras spins around the idea of how to take incredibly detailed pictures with a camera that is very small and portable.

Moreover, people tend to buy a certain kind of smartphone just because it has a high number of megapixels and then they are surprised to see that an actual digital camera with less or the same number of megapixels is taking better pictures. This is due to the fact that people confuse the number of megapixels with the image quality. Pixel counts only determine the file size, not the image quality. It is far more important to look at the lens quality, the sensor size or the physical features of the camera, rather than get attracted to high numbers.

The following top 10 best point and shoot cameras will help you through your search on finding out what camera suits you best.

1. Olympus OM-D E-M1

best point and shoot cameras

With impressive image quality, excellent ergonomics and a great collection of high end features, this camera is the finest example of value for money. Although it cannot actually be considered affordable, it is worth every cent.

The Olympus has a lot of controls built into its body, like the viewfinder, in-camera HDR settings, self-timer, mode dial, video record button and many more. Moreover, the image quality in low light and even at high ISO settings really makes it stand out from the crowd.

This is considered to be the best point and shoot camera, 2013 and has some of the most advanced features available on the market.

2. Sony RX100 III

Sony RX100 III

Sony RX 100 III is considered the rock star of the year 2014, in terms of compact digital cameras, as according to several reviews. Some of the great features that come with the camera and are absolutely worth mentioning are the 20.2 Megapixels resolution matched up with the 1 inch sensor size, the breakthrough pop-up electronic viewfinder and the 2.92x zoom lens.

The only downsides of this camera are the price and the limited focal range. Light weighted, compact and with incredible features, this camera is also a serious contender for the title of best point and shoot digital camera.

3. Canon EOS 6D

Best point and shoot cameras

A compact, full-frame sensor camera considered inexpensive for its class. Even though it offers some amazing features, including integrated GPS and WI-FI, the camera moves a bit slow. However, Canon as a company stands out for image quality and professionalism, this camera being no exception from the rule.  The image quality is amazing, especially at high ISOs.

4. Fujifilm FinePix S1

Best point and shoot cameras

Even though it cannot be considered the perfect super-zoom camera, the Fujifilm FinePix S1 is still top notch. This point and shoot camera is waterproof, it has a 50x zoom and good quality for images and videos. However, it does have some focusing issues and it can be noisy at high ISOs.

5. Olympus Tough TG-2 iHS

Olympus Tough TG-2 iHS

Second waterproof camera in the top, the Olympus Tough TG-2 iHS is an excellent choice for taking photos of your adventures and doing it with style. It can go as deep as 50 feet underwater and performs beautifully at high ISO.

6. Nikon Coolpix S9700

Nikon Coolpix S9700

Nikon Coolpix S9700 is the only Nikon camera featured in this top. It has good quality images and it’s a great choice for snapping pictures during your vacation or when you travel.

7. Sony Alpha 6000

Sony Alpha 6000

One of the things that makes the Sony Alpha 6000 a competitor for best point and shoot camera is its incredible focus speed. The image quality stands out as well but it lacks in other technical features. According to Cnet, the Alpha is “the best prosumer mirrorless ILC”.

8. Canon PowerShot S 100 12.1 MP

– Digital Camera with 5x Wide Angle Optical Image Stabilized Zoom

Best Point and shoot camera 8

This is an excellent choice for a low budget, being fairly cheap and it is a good example to use to show people how digital cameras have evolved throughout the years. Canon PowerShot S100 was rated the best compact digital camera in 2012.

With number 8 we conclude our list of best point and shoot cameras. In our opinion, these are the best models on the market. What do you think?