Are you looking for something to make your photographic work stand out of the ordinary? Do you wish to improve your Photoshop skills? This step by step Photoshop photo manipulation tutorial will teach you how to turn your portrait into an eerily beautiful piece of art. Let’s get it started!
Step 1: Select the Original Portrait
Open the picture you want to transform in Photoshop. Once opened in Camera Raw, you will need to adjust contrast and luminosity.
Before that, however, you will need to copy the layer. Right-click on it and select “Duplicate Layer”. You can use the Ctrl + J command for this as well.

Name this layer (I have named it “Pic 1”), and then hit the OK button. It will appear in the Layers Menu located at right side of the screen.

Step 2: Adjust Luminosity & Contrast
To modify luminosity and contrast, click on the Image drop-down menu at the top of the page, select Adjustments, and then Brightness/ Contrast. For my portrait, I have set Luminosity to -33, and contrast to -4.
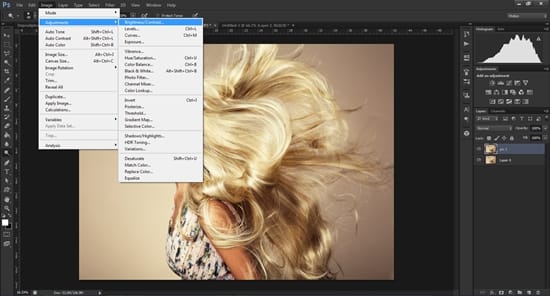
Note that these values vary depending on the picture’s background. It is important to perform these adjustments until you achieve a contrast to your liking between the background and the subject of your pic.

Step 3: Set Color Balance
The third step is nice and simple. As previously done, click on the Image Menu, select Adjustments, then Color Balance (the Ctrl + B command works fine too), and be ready to edit the color levels and tones.
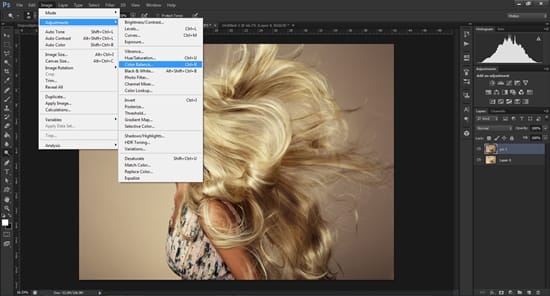
I’ve set Cyan to +21, Magenta to -4, and Yellow to 0.

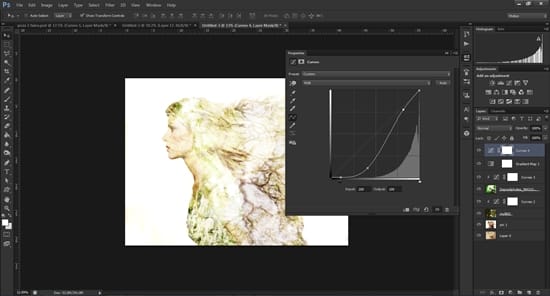
If you wish to accentuate contrast, select Curves from the same options menu, and drag the curve line downwards as in the picture below.

Step 4: Dodge and Burn the Image
Things get a bit more complicated as you grab the Dodge Tool found in the Tools panel. Following this move, you have to set Range from the options bar at the top of the page. Click on Highlights, set Exposure at 50% and uncheck the Protect Tones feature as shown in the pics below.

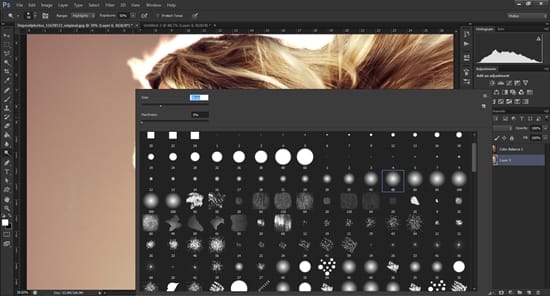

Next, you will have to paint over the background with a soft-edged brush tip until it gets white. While painting maybe you will need to resize your brush tip.

Step 5: Apply the Second Image
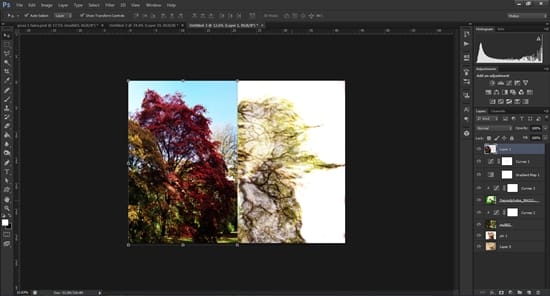
Bring on the eery element! Click File, select a picture to your liking, and click OK. I’ve chosen a tree image in order to achieve a fairy tale effect. I have named it tree0, and will refer to it again at step 7.

Right-click on the newly created layer and select Rasterize Layer. Don’t forget to hit the OK button.
Next, go to the Blend Mode Menu at the top of the Layers panel and select Screen. Now the tree picture will combine with your portrait as featured below.
Following this move, you’ll need to select the Free Transform mode. You can use the Ctrl+T command.
Now, to cover the portrait with the trees, and find the perfect angle at the same time, you will need to rotate and resize the layer. When ready, press Enter to apply your edits.
Step 6: Tone the Image
This action implies converting the image to near-monochrome. To perform these toning edits, you have to click the Create New Adjustment Layer icon in the Layers Panel. Next, select Gradient Map. Go to the Properties Panel, and click the gradient preview menu. Hit the cog icon and select Photographic Toning.
Next, click Append, and select the Cobalt-Iron 2 preset.

Step 7: Increase Contrast
Now, as you probably imagine, the contrast of the newly created image needs a boost. Here’s what to do:
- Click Create New Adjustment Layer icon.
- Select
- Draw an S-shaped curve – the more pronounced the S-shaped curve, the greater the contrast.

After you have created this layer (I have named it ”Curves 1”), drag it down until it gets between the Gradient Map layer and the tree0 layer. Right-click Curves 1 and select Create Clipping Mask. Now, this layer will be subordinated to the tree0 layer, and all edits will apply only to it.

If you wish to boost the contrast more, create a new layer and play with the Curves function.

Step 8: Bring on the Third Image
For the second tree image, we’ll repeat all moves from Step 5: Click on File, select the picture you wish to add, and hit the OK button. Right-click on the new image, and select Rasterize Layer.
As we did with the first tree image, we need to transform the layer. The Ctrl+T command will allow you to enter the Free Transform mode. If you can’t see the edges of the bounding box, the Ctrl+0 command will bring them into view again.
Next, as you already know, you have to rotate and resize the new layer so that it works well with the other pics. Once you achieved the desired results, press Enter to apply all editing changes.
As a tip, try not to blend the new pic with the other ones too much, so that the subject remains perceivable.
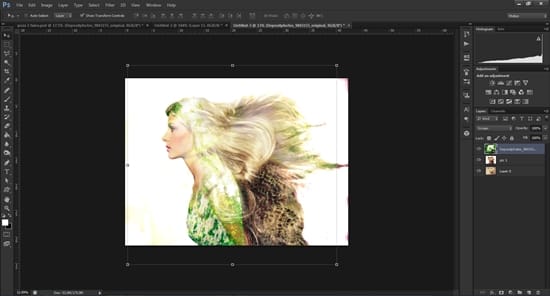
Step 9: Final Retouch & Result
To better observe the details of the newly created layer, apply a new filter. Click on New Adjustments Layer icon, and select Hue/ Saturation.

I’ve made the following modifications: Hue -24, Saturation -1, and Lightness +6. Right-click the new layer, choose Create Clipping Mask.
You should work on Opacity levels too. I’ve modified the opacity of the Gradient Map layer to 75% so that to keep the skin tones of the original portrait visible.
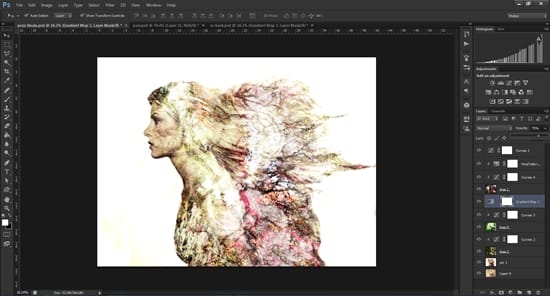
Here is the outcome: an incredible dreamlike portrait!

Now that we have approached each step and technical aspect of turning your portrait into a dreamlike masterpiece, you may look for further inspiration. There are many imaginative photographers who, for instance, took self-portrait photography to another level by adding a surreal touch to their work.
To drop a few names, Joel Robison, Zev (also known as Fiddleoak), and Erik Johansson will blow your mind away with their magnetically surreal photo manipulations.
I hope this photo manipulation tutorial will stimulate your creativity and help you to refine your Photoshop skills. If you have any other creative ideas, I’d love to hear from you. Fill free to contact me for any questions, ideas, or suggestions. Let’s share the joy of playing with dreamlike photo manipulation techniques. Cheers!


